Arj256 - Mk2 Restoration
-
Arj256
- Site Supporter

- Reactions:
- Posts: 28
- Joined: 04 Aug 2012, 23:39
- Bike Owned: Mk2 CRM 250
- Location: Portsmouth
Arj256 - Mk2 Restoration
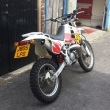
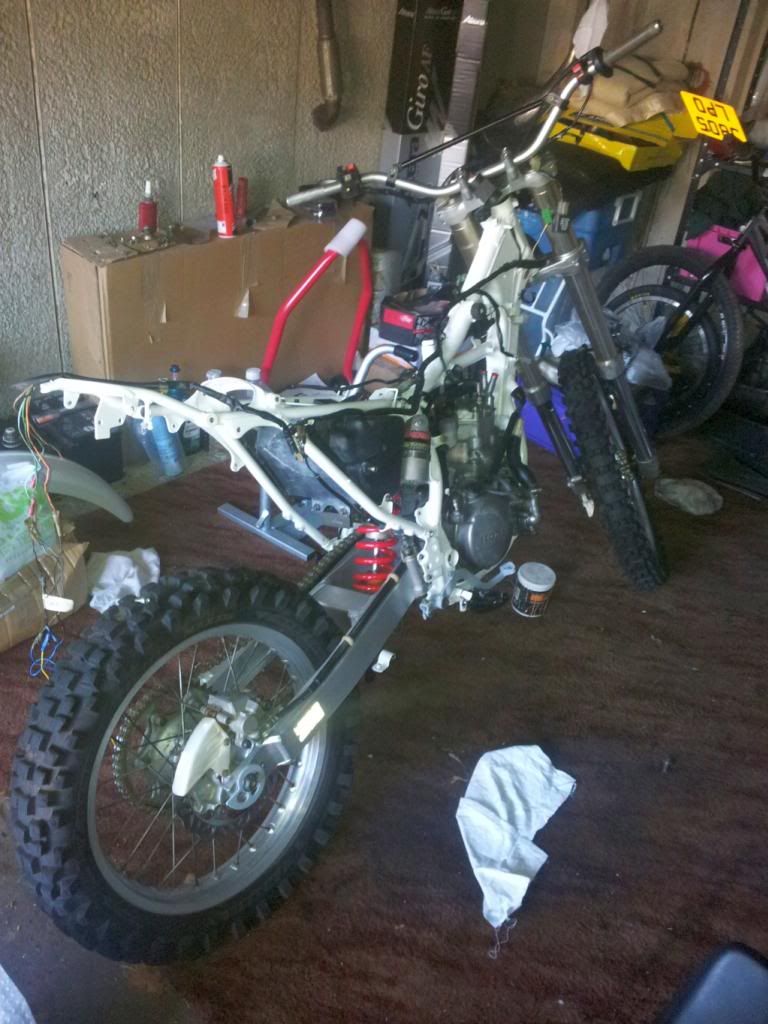
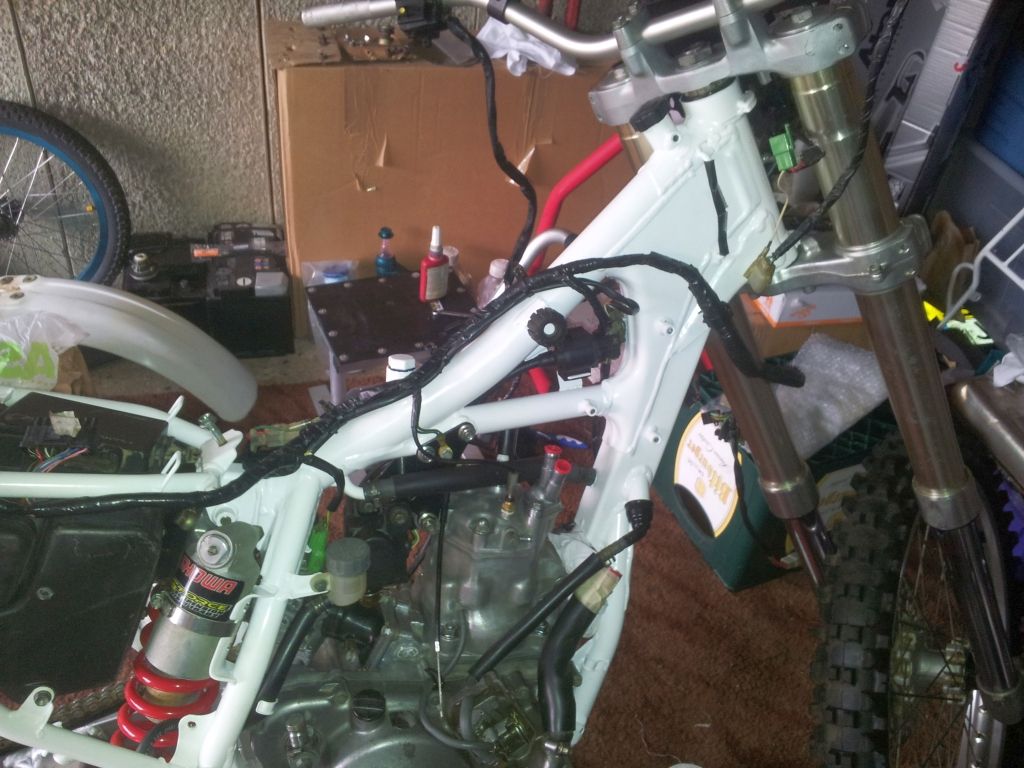
With the yokes on, I could refit the forks to allow the bike to stand on its own wheels again 
I will remove them at a later date, as I would like to strip them down and inspect the internals and change the oil.
But it’s quicker to get the rest of the bike done now and remove them near the end.
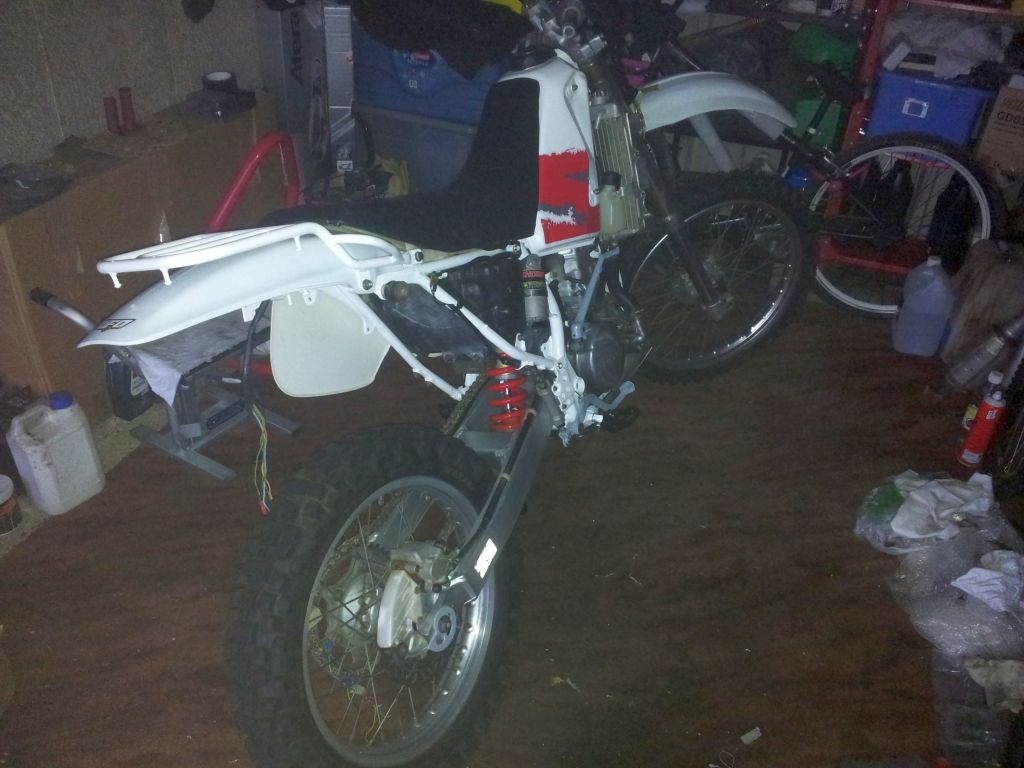
So with the forks fitted:
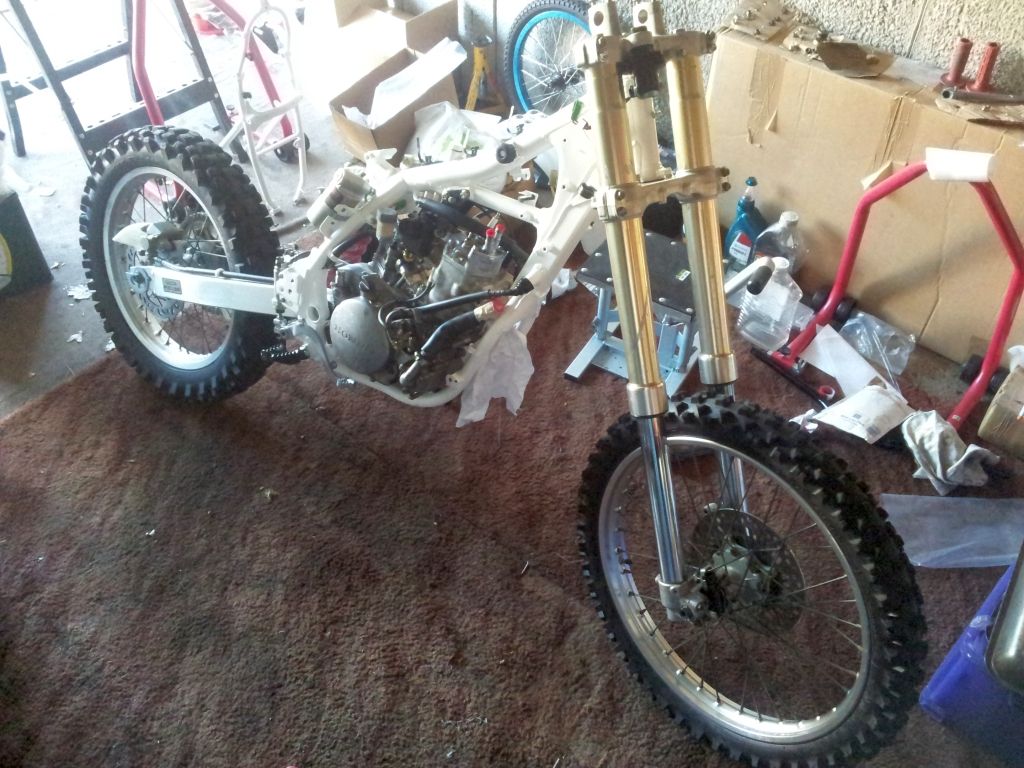
With the forks on I was quite excited to see how it would look with the repainted fuel tank and decals on.
So I quickly placed it onto the bike to see how the bike would look:
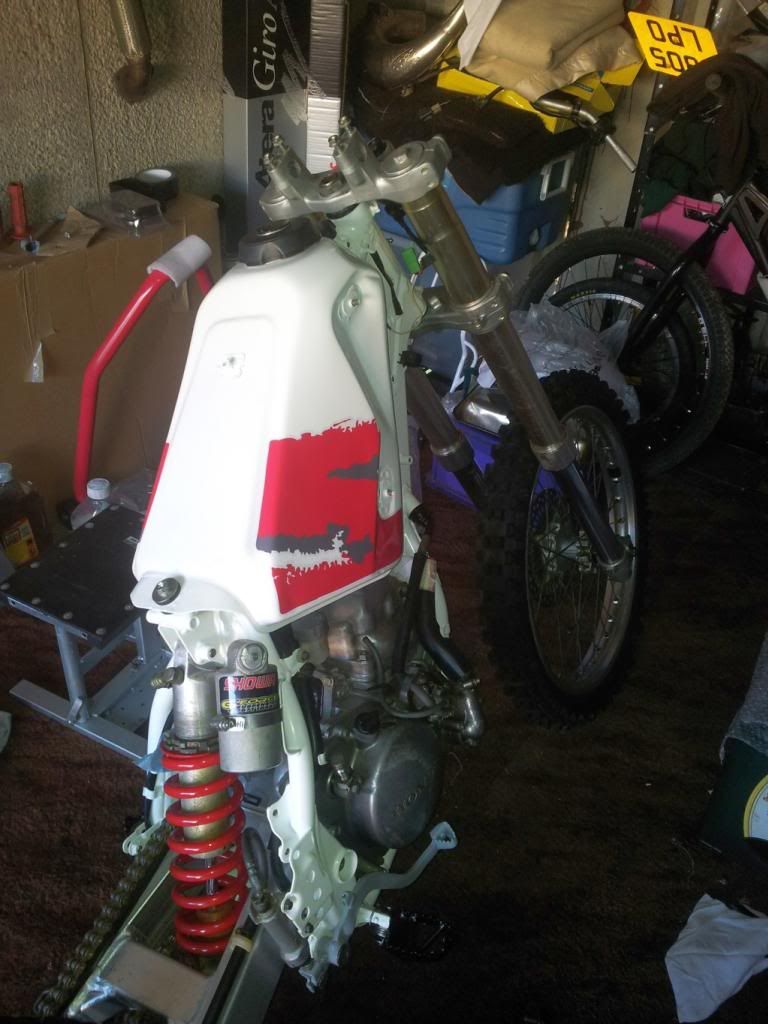
With the tank on I also fitted the rear sub frame, and the handlebars. This had the added benefit of clearing some floor space in the garage to.
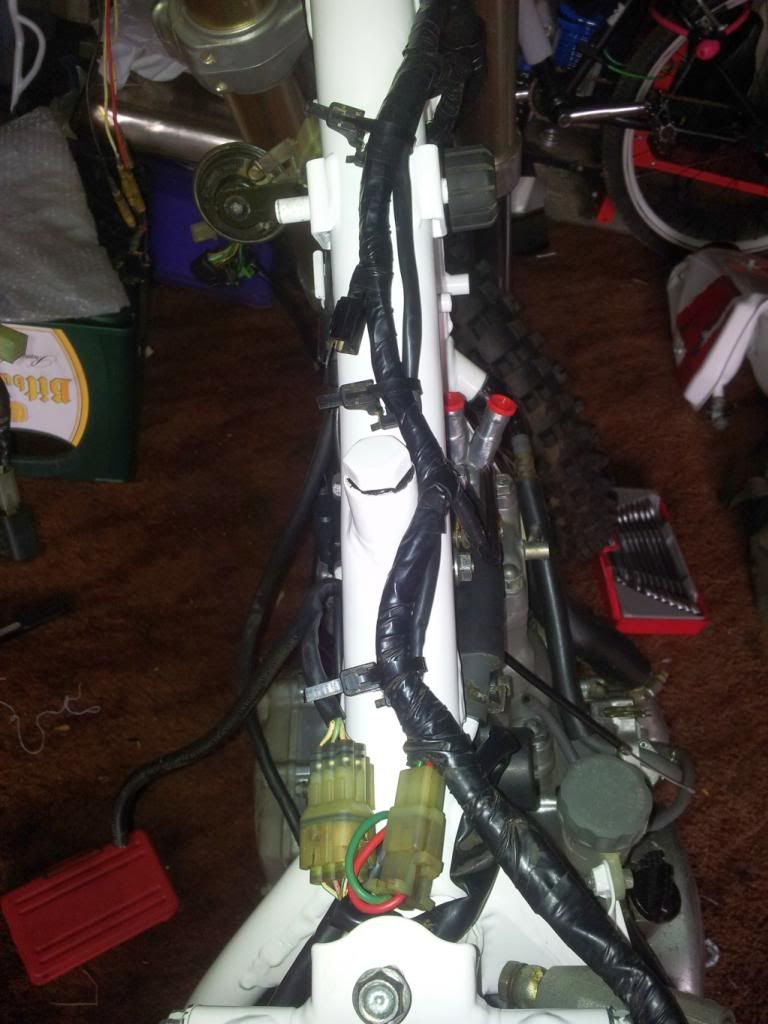
As it was nice weather outside, I set about giving the loom a good clean and inspection.
It was rather muddy and oily to begin with:
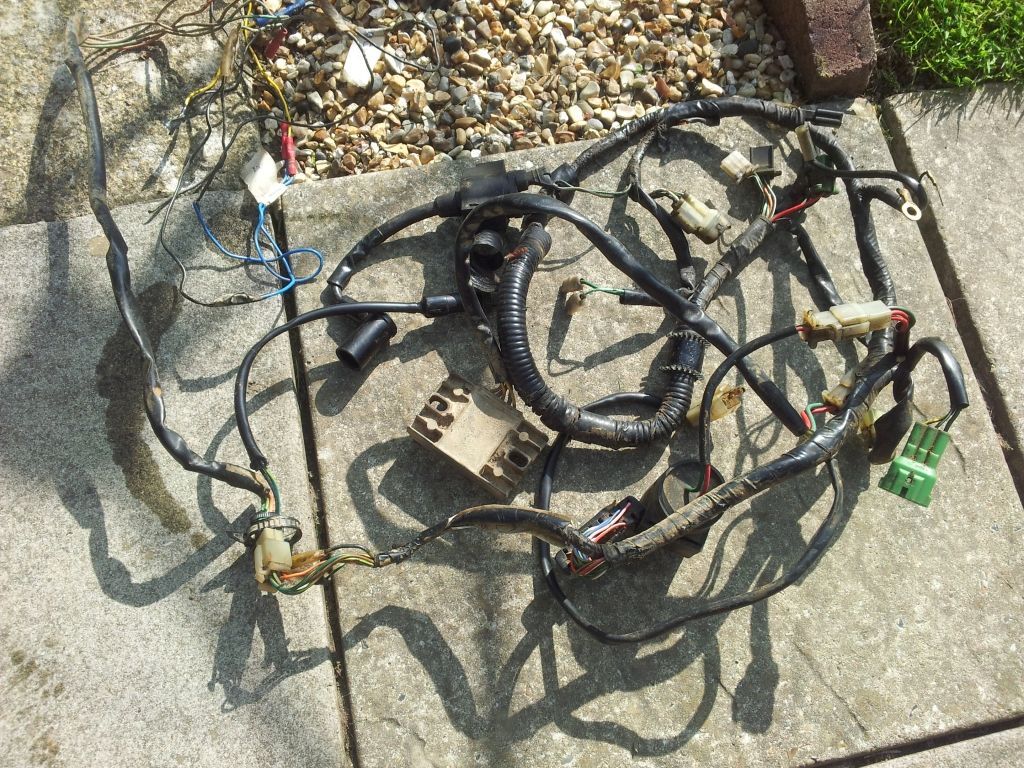
After quite alot of cleaning and removing the bad insulation, I could set about inspecting the cabling and re wrapping areas which could benefit from fresh insulation tape.
I decided against fully stripping down the electrical loom, as everything was working when I took it apart and there shouldn't be any logical reason why this won’t be the same when I use it again.
I will remove them at a later date, as I would like to strip them down and inspect the internals and change the oil.
But it’s quicker to get the rest of the bike done now and remove them near the end.
So with the forks fitted:

With the forks on I was quite excited to see how it would look with the repainted fuel tank and decals on.
So I quickly placed it onto the bike to see how the bike would look:

With the tank on I also fitted the rear sub frame, and the handlebars. This had the added benefit of clearing some floor space in the garage to.

As it was nice weather outside, I set about giving the loom a good clean and inspection.
It was rather muddy and oily to begin with:

After quite alot of cleaning and removing the bad insulation, I could set about inspecting the cabling and re wrapping areas which could benefit from fresh insulation tape.
I decided against fully stripping down the electrical loom, as everything was working when I took it apart and there shouldn't be any logical reason why this won’t be the same when I use it again.


-
Arj256
- Site Supporter
- Reactions:
- Posts: 28
- Joined: 04 Aug 2012, 23:39
- Bike Owned: Mk2 CRM 250
- Location: Portsmouth
Arj256 - Mk2 Restoration
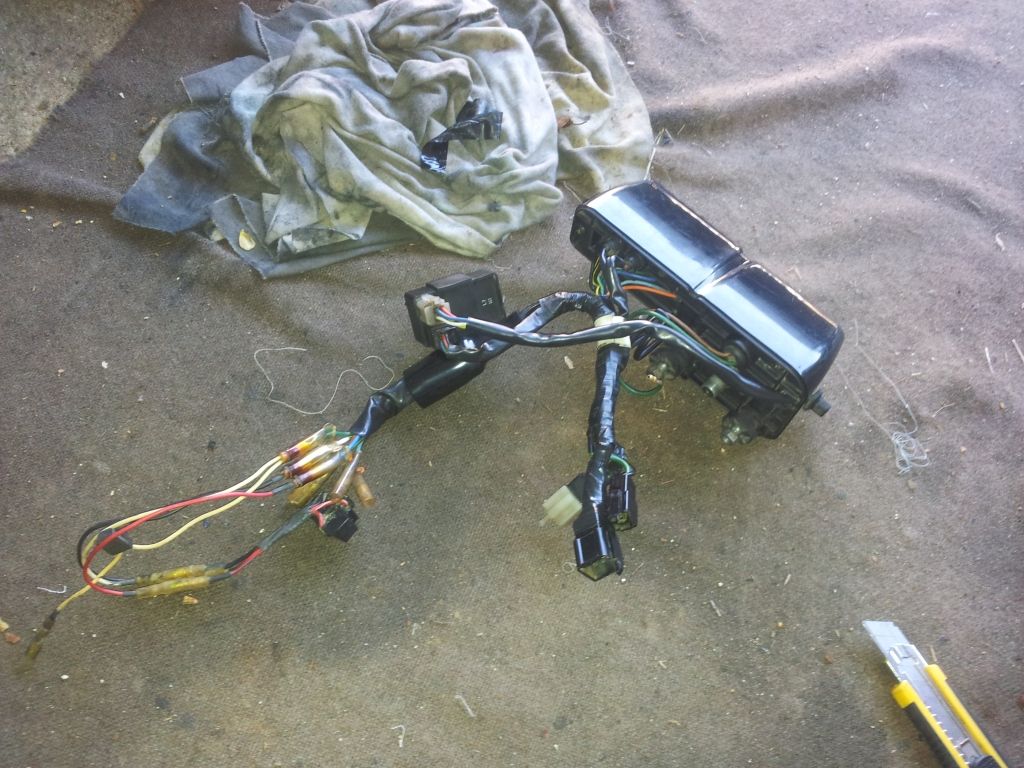
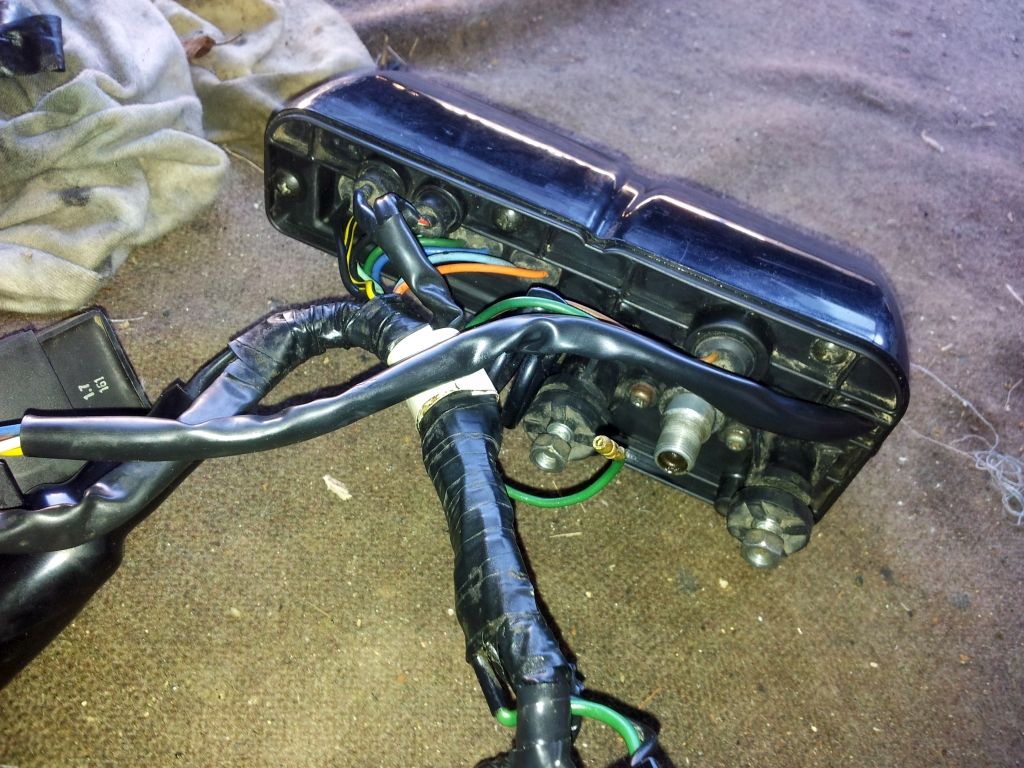
The loom all cleaned up and re-taped ready for fitment:
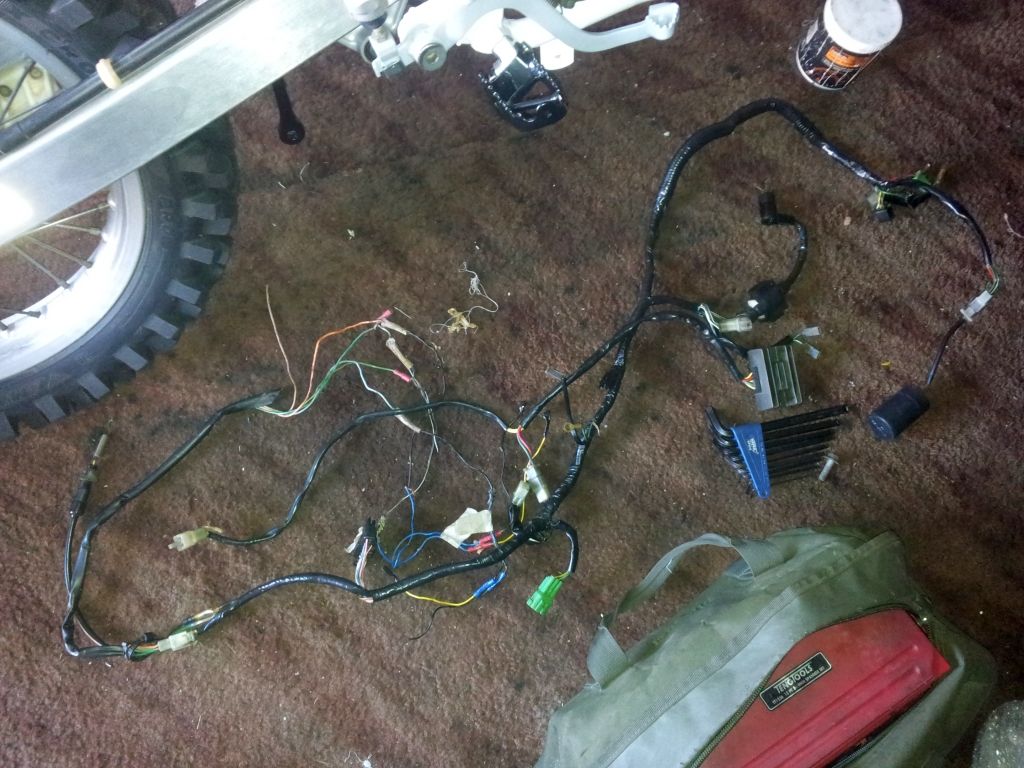
I then set about fitting the loom, which due to me having it off the bike for a while, took me abit of time to remember exactly where everything went.
Thankfully I took plenty of pictures, and the maintenance manual was helpful along with the parts fiche to ensure some of the clips were in the correct position.
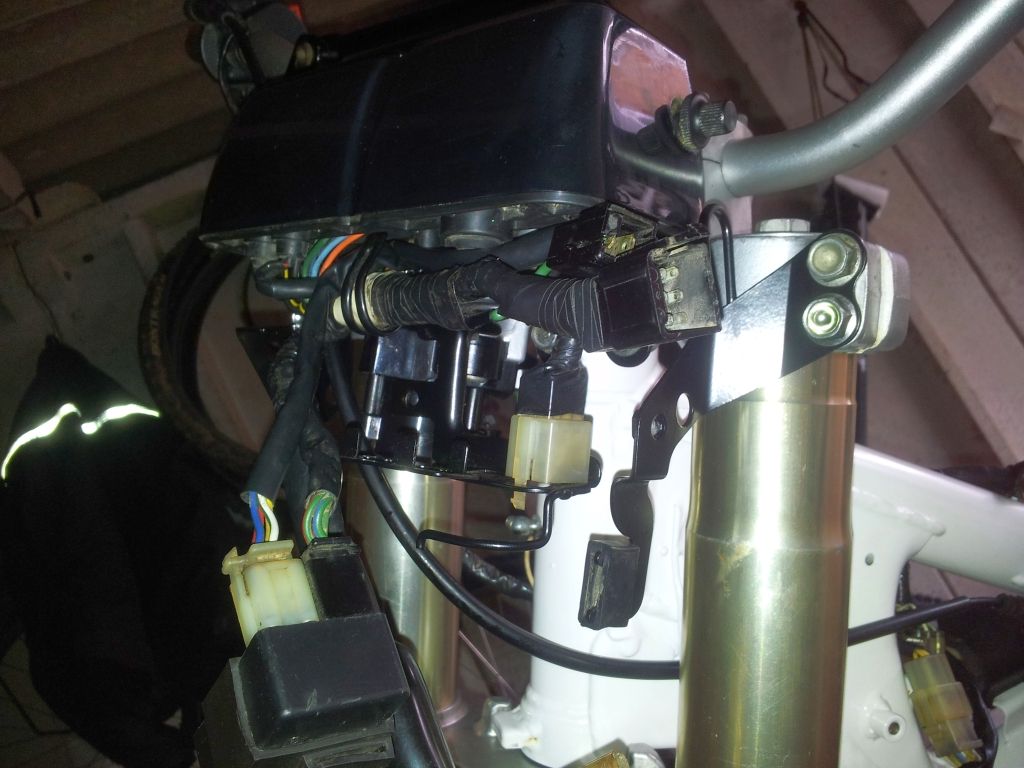
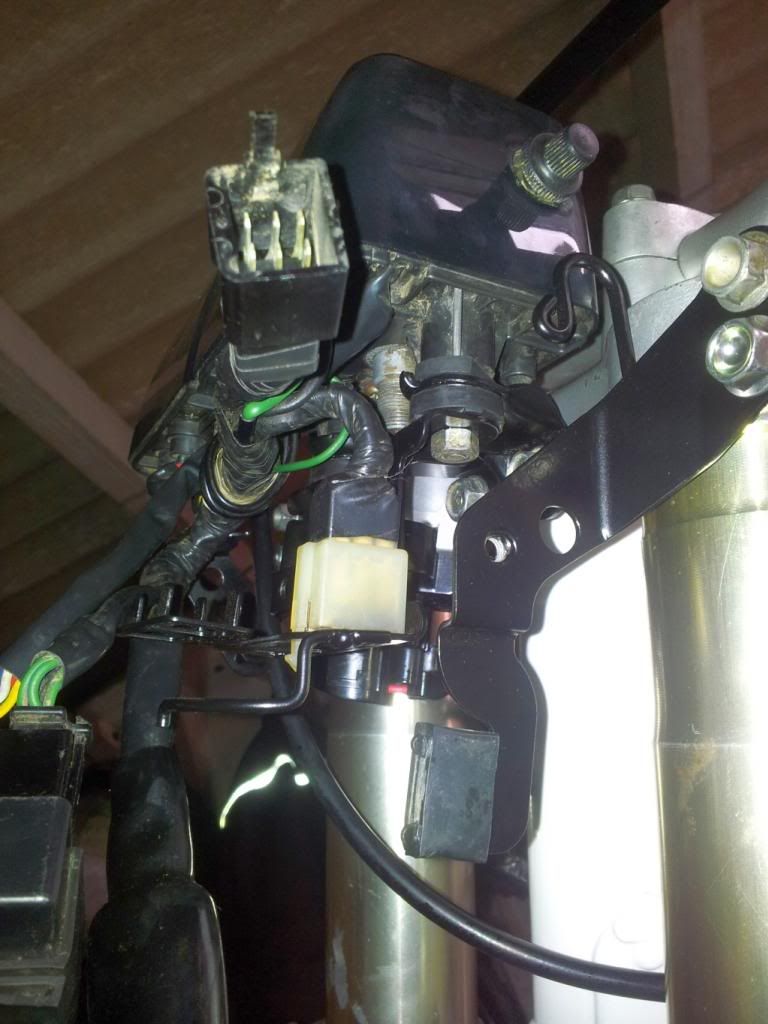
Anyone have an idea what the 2 pin plug does under the tank?

-
Arj256
- Site Supporter
- Reactions:
- Posts: 28
- Joined: 04 Aug 2012, 23:39
- Bike Owned: Mk2 CRM 250
- Location: Portsmouth
Arj256 - Mk2 Restoration


With the loom fitted, I set about fitting a new mudguard onto the rear subframe as mine was yellowed and cracked.
This was simple enough to fit, requiring 4 holes to be drilled into the mudguard to allow for the seat fitment, and the rear rack/handhold.
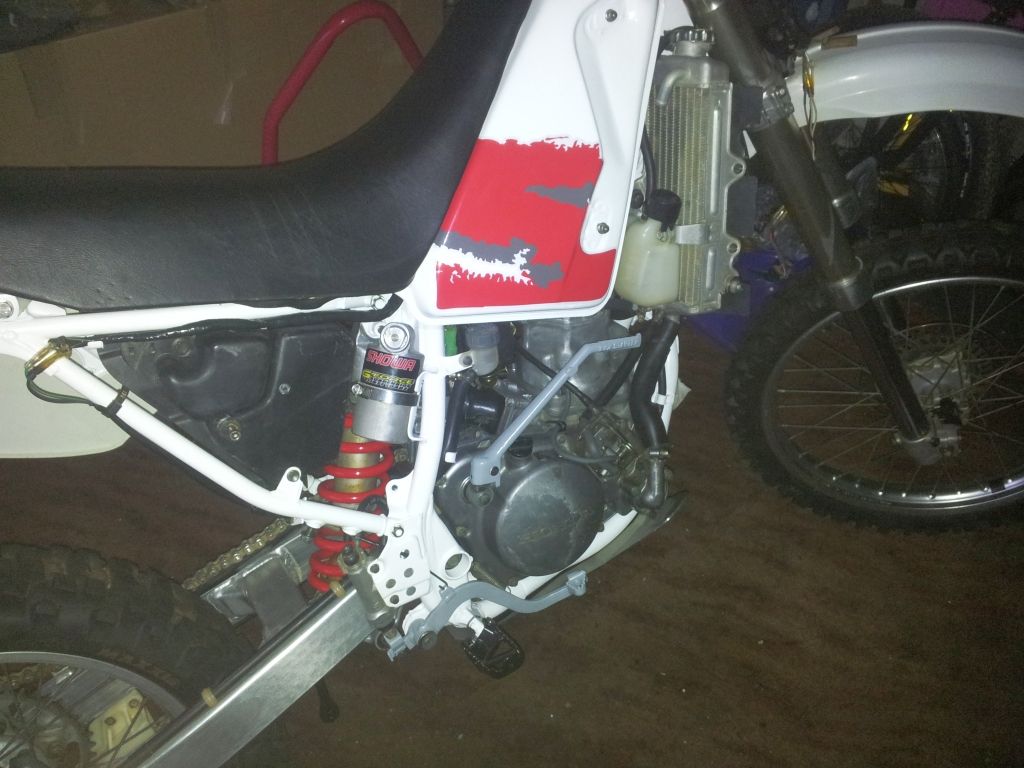
With the rear mudguard on I fitted the rack and the seat to see what it would look like:

So I wouldn't scratch the frame when lifting it onto the center stand, I decided to fit my bash guard which i managed to source off eBay a while back quite cheaply.
I decided to line up where it would mount against the paintwork with rubber tape to stop abrasion:

And then set about fitting it:

-
Arj256
- Site Supporter
- Reactions:
- Posts: 28
- Joined: 04 Aug 2012, 23:39
- Bike Owned: Mk2 CRM 250
- Location: Portsmouth
Arj256 - Mk2 Restoration
I decided to get the bash guard mountings powder coated the same colour as the frame, to allow them to blend in:
With the Nearside radiator all straightened out and fitted, I set about doing the same to the offside:
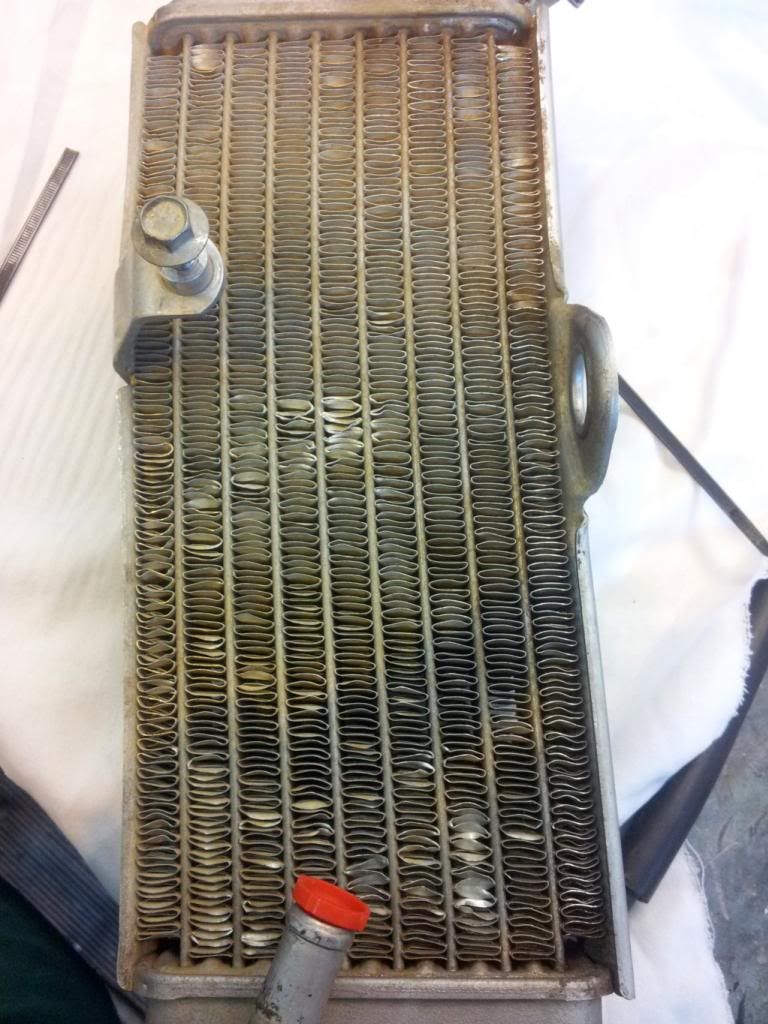
I found that the best tactic was to use cut down cable ties, and a watchmaker’s screwdriver when you couldn’t get the cable ties inside the fins.
The nice thing with using the cable ties is, you could eventually push them through to the other side and work them against each other to straighten the fins.
The end result was a good flowing radiator:
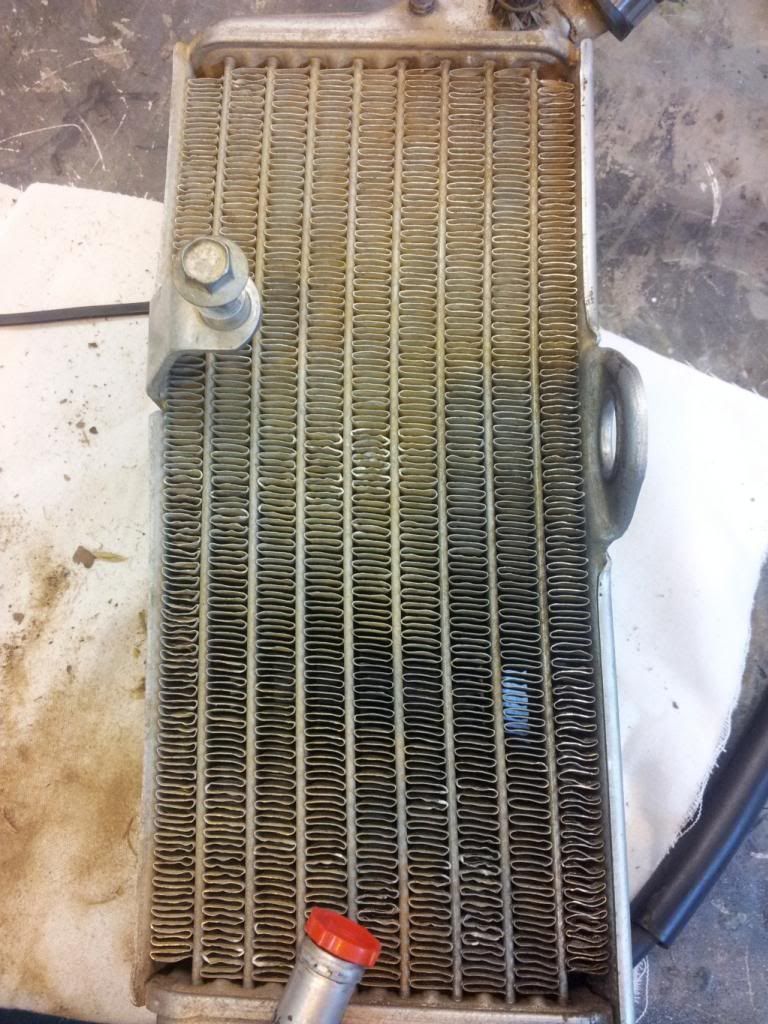
Which I subsequently fitted to the bike along with the coolant reservoir:
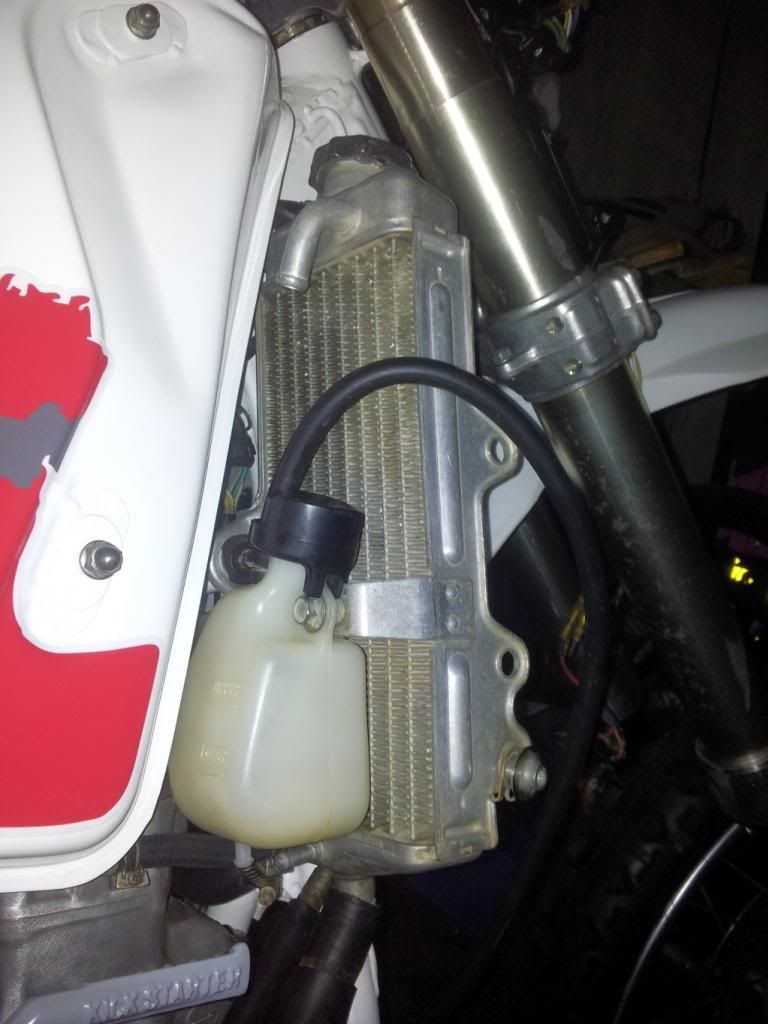
And that is as far as I have gotten so far:


-
Arj256
- Site Supporter
- Reactions:
- Posts: 28
- Joined: 04 Aug 2012, 23:39
- Bike Owned: Mk2 CRM 250
- Location: Portsmouth
Re: Arj256 - Mk2 Restoration
Thanks for the comments, have gotten abit behind on updating the thread.
Just brought it up to date now.
Just brought it up to date now.
-
knackeredMk1

- Super Moderator

- Reactions:
- Posts: 4185
- Joined: 03 Nov 2006, 17:41
- Bike Owned: Modified Mk1
Re: Arj256 - Mk2 Restoration
Two pin plug under the tank - Oil level sensor?
Three pin - Side stand. One pin - Thermostat.
Looking very good ................
Three pin - Side stand. One pin - Thermostat.
Looking very good
-
fallenmikethebike
- NWAA Supporter

- Reactions:
- Posts: 3520
- Joined: 02 Dec 2007, 16:02
- Bike Owned: MK3
- Location: Mid Surrey
Re: Arj256 - Mk2 Restoration
Tidy looking MK2 for sale shortly then 
 +1 to Steve's comment.
Mike
Mike
VFORCE REEDS-MUGEN HEAD AND BARREL-WHITE POWER-ALL ON MY WISH LIST!!
-
andrew19
- Site Supporter
- Reactions:
- Posts: 121
- Joined: 02 Oct 2011, 23:07
- Bike Owned: 250 MK3
- Location: Swansea
Re: Arj256 - Mk2 Restoration
Makes for interesting reading and will no doubt spur me on to overhauling one of my Mk3s
Looking forward to seeing photos of the finished article.
Looking forward to seeing photos of the finished article.
-
helisupp

- NWAA Supporter
- Reactions:
- Posts: 744
- Joined: 12 Apr 2012, 21:57
- Bike Owned: CRM AR (4)
- Location: Gloucester
Re: Arj256 - Mk2 Restoration
The cost of refurbishing a bike that looks complete and in good condition costs just as much as refurbishing a bike in bad condition.
If you start at the front wheel and finish at the back wheel, replacing all bearings, seals, top end, gaskets, exhausts system, repaint and refurb of rest of bike etc, the costs really do mount up.
I think some bikes are stripped for a minor refresh, and when they see the cost of suspension and swingarm bearings, top end kit, exhaust, stickers, and scores of other items the cost is prohibitive and the bike gets dismantled for parts.
Not a bad thing as I purchased a complete swingarm and suspension linkages on ebay for £35, included new swingarm bearings in a honda packet.
The bearings would have cost me £100 from a dealer.


Re: Arj256 - Mk2 Restoration
I was just wondering, where i have an oil sensor on my frame, you just have a bolt blanking the hole and i didnt see a picture of the sensor fitted before the seat went on. My question is do you have the sensor removed? Because they do tend to leak oil and in the past mine has been no different. Mine has been resealed with silicone but i expect itll leak again one day. I wonder if there is a way around this
Sean
Sean

Re: Arj256 - Mk2 Restoration
They usually leak where the wires come out the bung & not from around the edges
Re: Arj256 - Mk2 Restoration
the bung itself was loose on mine and it was dripping oil from where it wasnt tight in the frame, i resealed it with silicone when i bought the bike and it hasnt been a problem since. i dont know how long that will last though, could be ten years, could be ten weeksjompy wrote:They usually leak where the wires come out the bung & not from around the edges
sean
Re: Arj256 - Mk2 Restoration
Well lets hope it lasts as they're £45 new as mine was leaking from the wires , i tried to take the bung out knowing i'd probably break it & i didn't disappoint 

Re: Arj256 - Mk2 Restoration
Sorry to revive an old thread but i just noticed this is my bike lol i knew she was well taken care of but im glad to see the quality of the work done , sadly the exhhaust blew causing the top end to go with under 500 miles on it. The wheels also were beyond use when i went to replace the tyres so i had the wheels rebuilt with gold sm pro rims , gold powdercoated hubs and stainless spokes. I have replaced the full exhaust with a dep system but i want to have the fmf pipe repaired if possible as it felt like it made more power. She will now be getting a full engine rebuild to keep her alive.
Re: Arj256 - Mk2 Restoration
Nice find bud