Page 2 of 3

Re: And so it begins.......... Mk2 rebuild

Posted: 15 Sep 2011, 22:26
by twistednuts
I planned on spendin 200 quid max to get mine sorted......

Over 600 quid later an i finished it :D an i didnt even get the frame coated!! Mainly cos im a tight ass

Re: And so it begins.......... Mk2 rebuild

Posted: 16 Sep 2011, 07:26
by knackeredMk1
My Mk1 cost me a little under £6k in total :!: .

Re: And so it begins.......... Mk2 rebuild

Posted: 16 Sep 2011, 11:13
by Hallsy
:OMG You must have bought everything from LT ;)

Well, I don't think my rebuild will be anywhere near as extensive or polished as yours, but I reckon I will spend around £400 on mechanicals by the time I've finished and I paid £350 for the bike (or should that be bits!!??).

I'm logging what I spend. I'm lucky that I can save money by making bits where necessary, or having suitable bearings/seals laying around.

Head bearings are next, thought I could get away with cleaning & regreasing, but the races are a little tarnished in places and removing the lower one for cleaning will be near on destructive, so I've ordered a new pair.

Re: And so it begins.......... Mk2 rebuild

Posted: 18 Sep 2011, 20:05
by Hallsy
Finally got my heavy duty paint stripper through on Friday, so tried some on my fork uppers. It worked well, but unfortunately the uppers are in quite a sorry state underneath. A few scuffs & scrapes, uneven shade of anodising, so unfortunately I will have to paint them again. Probably go with the same satin gold that I'll repaint the engine casings with, will have some pics tomorrow as I've not done anything with them all weekend.

Other than, I'm still waiting on bits from David Silver. Doesn't look promising for 7 day delivery as I ordered them last Tues and it still says they're on backorder :(

New rear wheel bearing retainer has been made:

Image
2011-09-17 18.16.54 by Hallsy01, on Flickr

Been out & about this weekend so nothing else going on, will crack on prepping fork uppers and flatting swingarm tomorrow.

Re: And so it begins.......... Mk2 rebuild

Posted: 18 Sep 2011, 21:43
by back off road
tidy bit of engineering hallsy ,wish i still had access to the work lathe and miller

Re: And so it begins.......... Mk2 rebuild

Posted: 18 Sep 2011, 23:23
by twistednuts
knackeredMk1 wrote:My Mk1 cost me a little under £6k in total :!: .
:OMG How is that even possible? No wonder your reluctant to sell it!

Re: And so it begins.......... Mk2 rebuild

Posted: 19 Sep 2011, 09:28
by Hallsy
back off road wrote:tidy bit of engineering hallsy ,wish i still had access to the work lathe and miller
I can't take credit for that unfortnately, a workmate of mine offered to make one as he didn't have much on!! It is very handy having machining equipment around, unfortunately I don't get to use it much anymore (not within my job role), but a while back the company created a toolroom to start making more parts in house again (fixtures, repair parts, etc) - but then this disbanded and the guys from the toolroom joined our engineering maintenance department, so they still get involved with a lot of machining work. As I say - handy ;)

Re: And so it begins.......... Mk2 rebuild

Posted: 22 Sep 2011, 22:23
by Hallsy
knackeredMk1 wrote:Moving on :) .

Looks like the fork bushes need to be replaced. Bare copper - not so good.
Got the Mk3 bushes through today from Wemoto, not 100% that they are both right, looks like one might be a little larger than Mk2, but I'll find out tomorrow when I remove the old ones and measure them.

One thing though, the bare copper you mention Nkd, that is on the outer of the bush, not the wear surface. The inner one that is seated in the recess is still grey (coating applied to copper bushes), and the inner on the outer one is still grey also. Still, won't hurt to replace them if these ones are right.

Re: And so it begins.......... Mk2 rebuild

Posted: 23 Sep 2011, 21:34
by Hallsy
Yep, looking again at the fork bushes I'd say they look totally fine, no obvious signs of wear on the friction surfaces, but that's my fault for ordering new (wrong!) ones without having a proper look.

Scuffed uppers have been filled and one of them pretty much prepped, will hopefully get these finished & painted tomorrow.

Yesterday I decided I would get the swingarm powder coated. The original anodising was worn in places and to get it uniform I used a flap wheel in a drill, which worked really well, but couldn't quite get in all the nooks & crannies, and unless you had a very steady hand, the brush lines were not perfect. I wasn't looking for something perfect, just uniform, but it would need protecting. I'd figured I would give it a couple of coats of 2K lacquer, but unfortunately it won't ahdere very well unless I use an etching lacquer, which is pretty pricey apparently. So I ditched that idea and will be getting it powder coated. Satin black or satin silver, undecided so far!!

I'd mentioned before the small crack where the dust seal fits on the bearing housings. Welding was discounted as unsure about it messing with any production heat treating, that and it would be a bit thin to make a decent job of. So as the bearings will support the inner, I decided to use a cap in place of the Honda dust seal to support it exteranlly and help prevent cracking. I'll use something like Loctite bearing retainer in the crack and between the housing and the cap.

Here's the small crack (sorry phone pics again as was at work!):

Image

And here is the original dust seal next to the cap I'll use:

Image

And in place:

Image

Also made up some new bearing sleeves for the swingarms as I didn't have the originals, but these are being heat treated at the moment. Got my swingarm pivot and few other bits through from David Silver now, so once the swingarm has been coated it will be ready for rebuild.

Also painted the linkage and dog bones:

Image

Moving along...........slowly!!

Re: And so it begins.......... Mk2 rebuild

Posted: 23 Sep 2011, 22:30
by Hallsy
Tonight was quiet so I decided to try to clean up the shock a little, which then lead me to stripping it down!! I know I'd been advised to leave it to suspension experts, but I had to have a look!!

I'd already disconnected the resorvoir as there was no nitrogen in it, and it was leaking oil from the banjo due to a missing copper washer.

The spring seat was caked in mud, grease and rust. There was no way the seat was going to 'tap' away from the centre piece and spring clip. Some Plus Gas and a hammer & drift sorted them out!! Looks like the two parts had rusted together so cleaned them up with a wire wheel, fit together nicely now.

Removed the bladder from the resorvoir, looked to be in good condition, but I have not yet pressure tested it.

The fun began when I started to strip the shock body. Seal head was tapped down and circlip removed, but trying to pull the seal head out wasn't too easy, the o-ring gets stuck in the recess for the circlip and needs quite a bit of force to remove it. I didn't have a slide hammer to hand, so decided to put an air fitting in the shock body and pressurise it force the seal head out. 6 bar later and the seal head was slowly moving, unfortunately I didn't fully consider how far the shaft would 'fly'!! Yep, the shaft went flying across the workshop into one of the doors!! In hindsight I should have rigged up something soft or something to catch it. Reassurlingly a workmate said when he did his 'it just popped out and slid across the bench'!!

Anyway, internal looks OK, but unfortunately I have damaged the piston slightly, so will need to source a new one. I've contaced a few suspension specialists to ask about serving costs, etc, but if spares are available I'll probably replace the o-ring and dust seal on seal head and the piston that I've damaged. Refill with oil then take it to a specialist to have it re-charged. I know that a specialist would be able to adjust the shims & piston to suit weight and riding style, but as I'm a total newbie I'm not convinced I'd know any better at the moment.

I'll replace the hose as well, it's not damaged as such, but it pretty hard & tired looking!

Anyway, shock stripped down (I'd put the bladder back in at this stage):

Image
2011-09-23 20.49.08 by Hallsy01, on Flickr

and the damage I caused :oops:

Image
2011-09-23 20.49.16 by Hallsy01, on Flickr

Re: And so it begins.......... Mk2 rebuild

Posted: 24 Sep 2011, 00:12
by Shockdoctor
Ouch....from the pic it looks like you've just damaged the piston ring, is there actual damage to the piston as well? they are usually pretty solid.

Re: And so it begins.......... Mk2 rebuild

Posted: 25 Dec 2011, 11:49
by maciej_mi
[quote="Hallsy"]Finally got my heavy duty paint stripper through on Friday, so tried some on my fork uppers. It worked well, but unfortunately the uppers are in quite a sorry state underneath. A few scuffs & scrapes, uneven shade of anodising, so unfortunately I will have to paint them again. Probably go with the same satin gold that I'll repaint the engine casings with, will have some pics tomorrow as I've not done anything with them all weekend.

Other than, I'm still waiting on bits from David Silver. Doesn't look promising for 7 day delivery as I ordered them last Tues and it still says they're on backorder :(

New rear wheel bearing retainer has been made:

[url=http://www.flickr.com/photos/25266351@N06/6156169923/][img]http://farm7.static.flickr.com/6167/615 ... 0244_b.jpg[/img][/url]
[url=http://www.flickr.com/photos/25266351@N06/6156169923/]2011-09-17 18.16.54[/url] by [url=http://www.flickr.com/people/25266351@N06/]Hallsy01[/url], on Flickr

Been out & about this weekend so nothing else going on, will crack on prepping fork uppers and flatting swingarm tomorrow.[/quote]


Hallsy i've got a question for you. Have you got some technical drawing of this part because i bought wheels of xr 400 without rear wheel bearing retainer. Or i need a do new one.

Re: And so it begins.......... Mk2 rebuild

Posted: 13 Aug 2012, 20:55
by Hallsy
I'm still here :P

Been a while, not really done much with the project since tail end of last year, been tied up with other projects and also had a couple more hiccups along the way.

When I went to fit the swingarm to the frame I discovered it was twisted. I could twist it enough to get the main pivot bolt through, but it was too tight and would have worn down the spindle. I tried to straighten it so no go, wish I'd looked at this before I prepped and painted it, but hey ho!!

A while later I found another swingarm, thankfully this one is straight :BB 
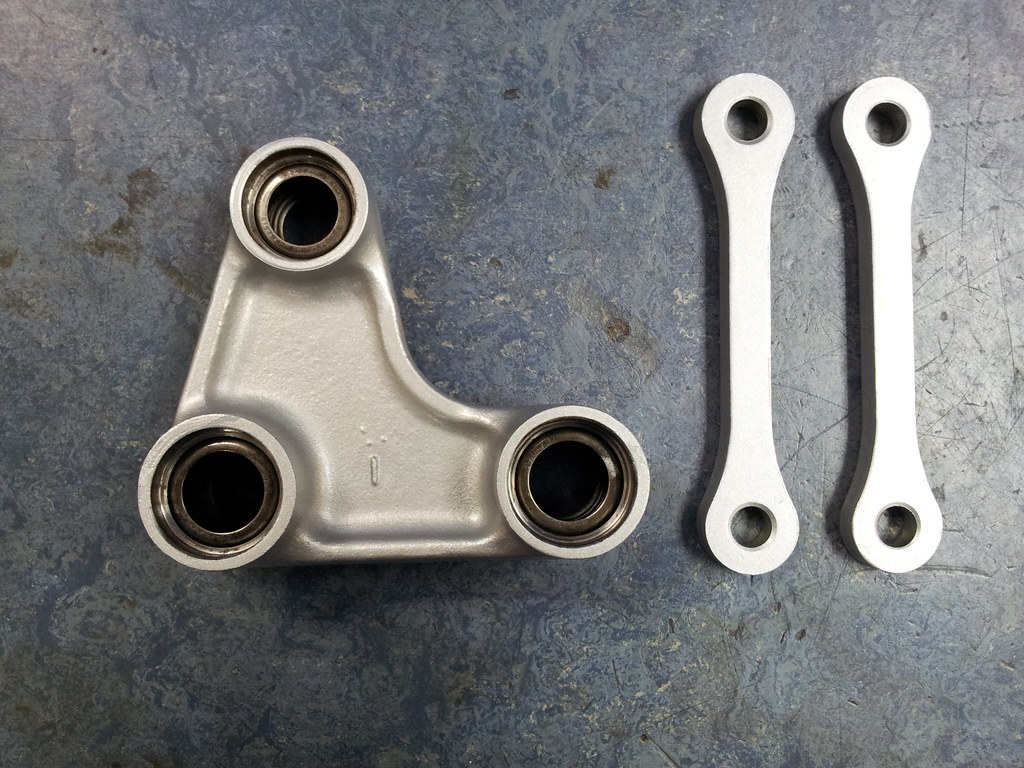
The swingarm has the usual scrapes and I didn't see the point in trying to get it looking mint this time, so just gave it a quick clean up and painted this and the yokes with Hammerite. Just to tidy them up a little without going mad on the prep. New bearings fitted all around.

Started to assemble it at the weekend but my pile of bits seems to be missing the shock bolts, and also I need to order a new bearing for the shock top mount.

Haven't got any pics at the mo, but will update in the next few days as I get more done.

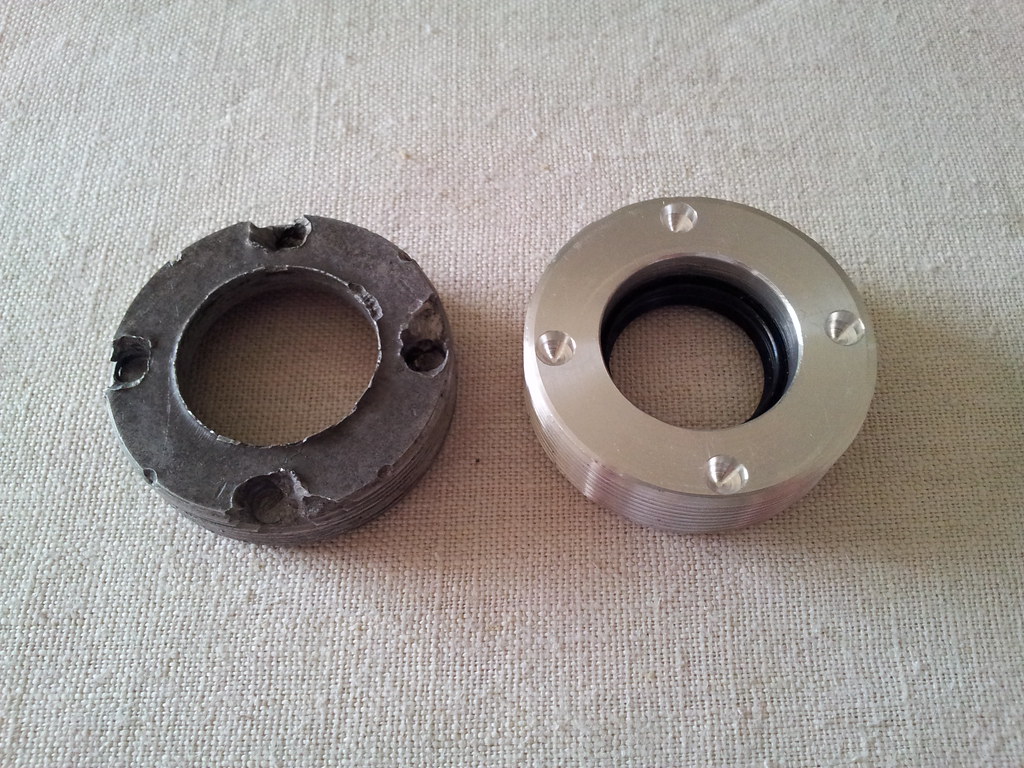
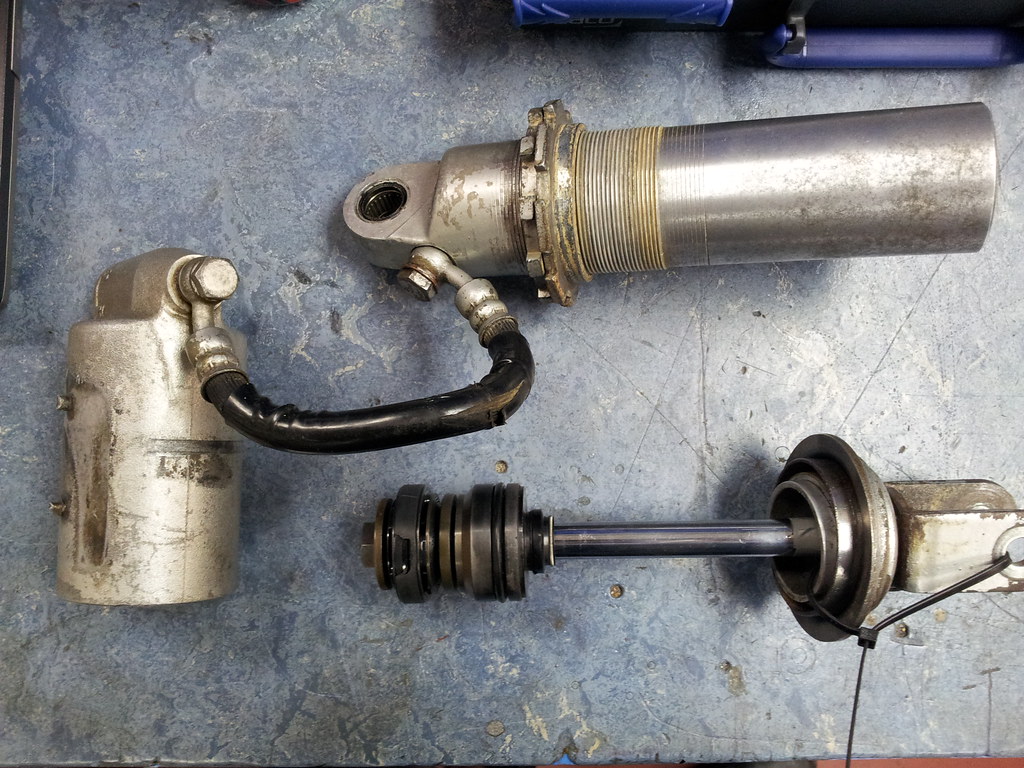
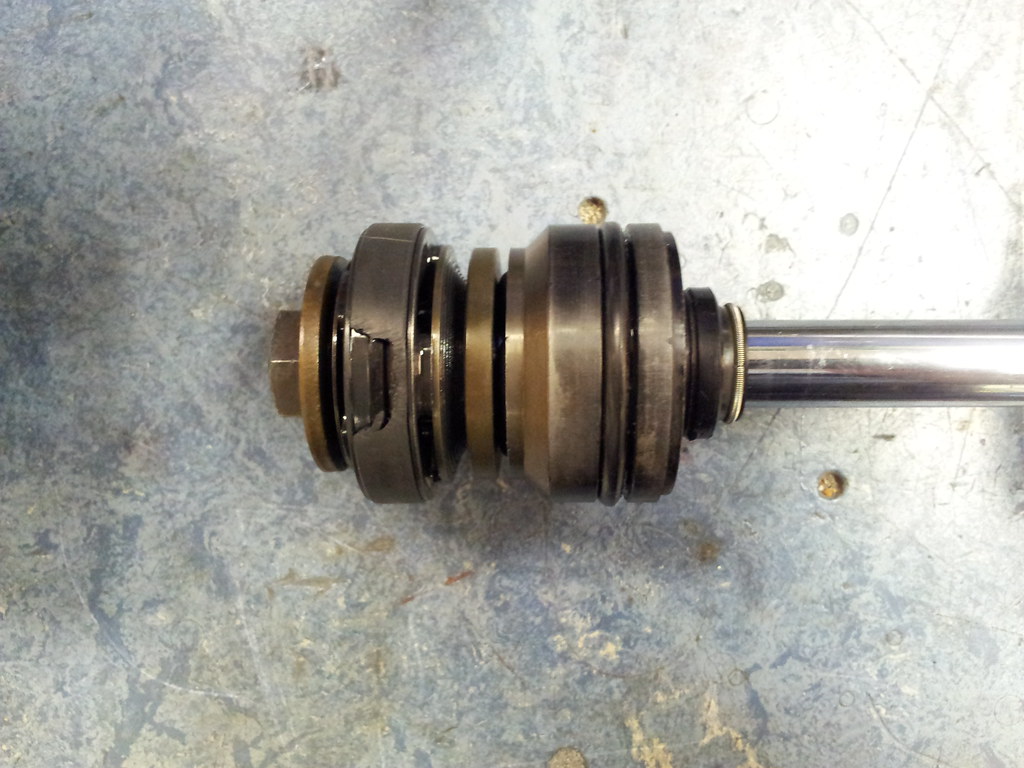
When I bought the swingarm I also bought some new forks which had much better looking uppers than mine. Idea was to make the best set out of both, trouble is, once I stripped them down I realised they were CR250 forks :roll:

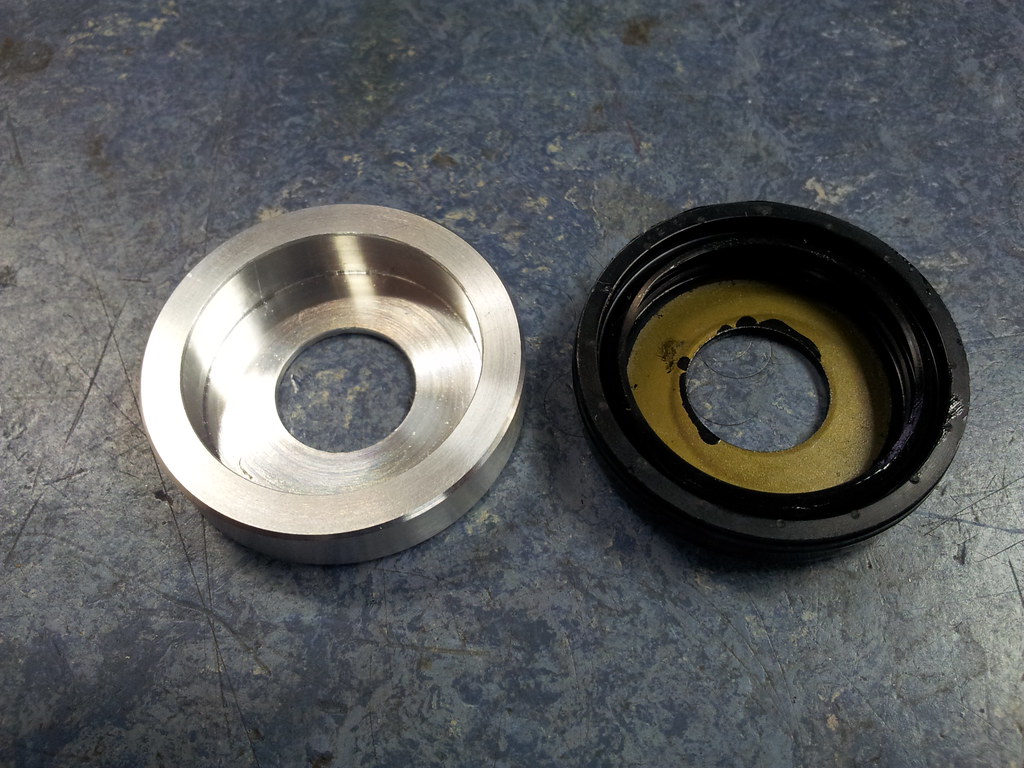
Still, no harm done, they were stripped, cleaned, new bushes and seals then rebuilt. One side was a pain getting the oil seal to seat, god knows why but got there in the end!! Luckilly they fit the lower yoke without needing machining (believe they are circa '92), but I think the upper yoke will need a shim - I've not measured it yet.

One question I have, the washer under the steerer nut - is it just that, a washer? I found a washer in the same box as the steerer nut that is the right size for top yoke, but just that the drawings describe it as a washer/dust seal. I'd call it a plain washer - so just wanted to be sure it's the right one!!??

Re: And so it begins.......... Mk2 rebuild

Posted: 13 Aug 2012, 20:56
by Hallsy
maciej_mi wrote:Hallsy i've got a question for you. Have you got some technical drawing of this part because i bought wheels of xr 400 without rear wheel bearing retainer. Or i need a do new one.
Hi Maciej, sorry I missed this.

I don't have any technical drawings I'm afraid, but I could draw you one up if that would help?

Re: And so it begins.......... Mk2 rebuild

Posted: 22 Oct 2014, 07:59
by Hallsy
Well, been a very long time!!

Had been busy with other projects, recently found the enthusiasm to strip down the bottom end.

Cases cleaned up, crank looks good, cases look clean internally - just need to fit new bearings now and reassemble.

Trouble is, it's getting in the way now and I've lost my way with the project a bit - even once built I'd still need to take my bike test, buy equipment, etc - but I'm trying to tighten the belt a little at the moment.

Recently bought a 944 Turbo which needs some light restoration, so time & funds will be needed there also.

Gutted to consider not finishing the project, but I'm considering selling up as spares. Not fully decided yet :(